With this feature, you will be able to launch a “Uber-like service” with your app. This module is provided with a Template & a Layout, these are both designed to play nicely with the CabRide feature, however, the module is useable with any other Layout.
How to configure the CabRide Features
Using the roles access management, you can allow or deny access to settings pages of this module:
For instance, you will be able to create a role allowed to accept drivers registrations requests while not allowed to access the payments page.
First, in the Add pages section, click on the app icon:

You’ll see this page:
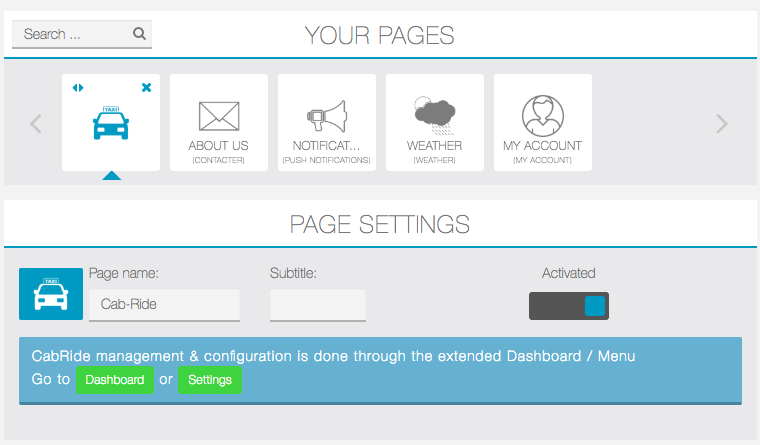
There are only shortcuts to the main Extended dashboard & menu now available on the left sidebar:
When you use the Taxi template, whatever the Cabride module position is, it will be shown at the top of list:

Open the Settings page to start with your module:
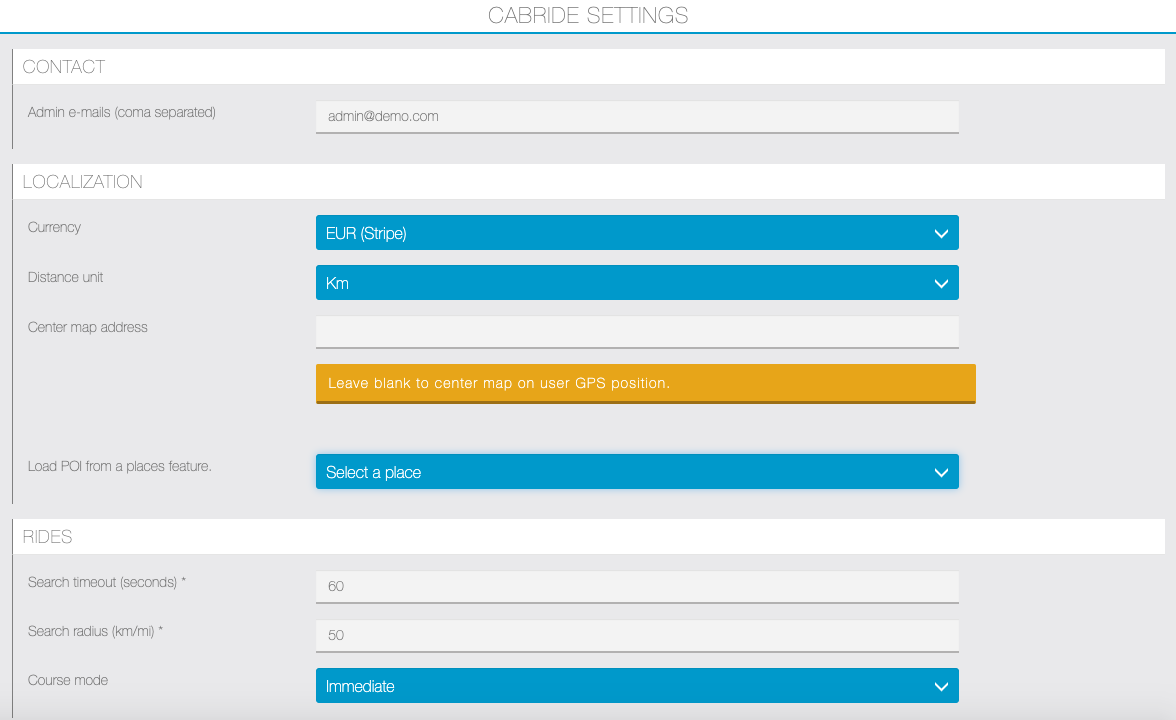
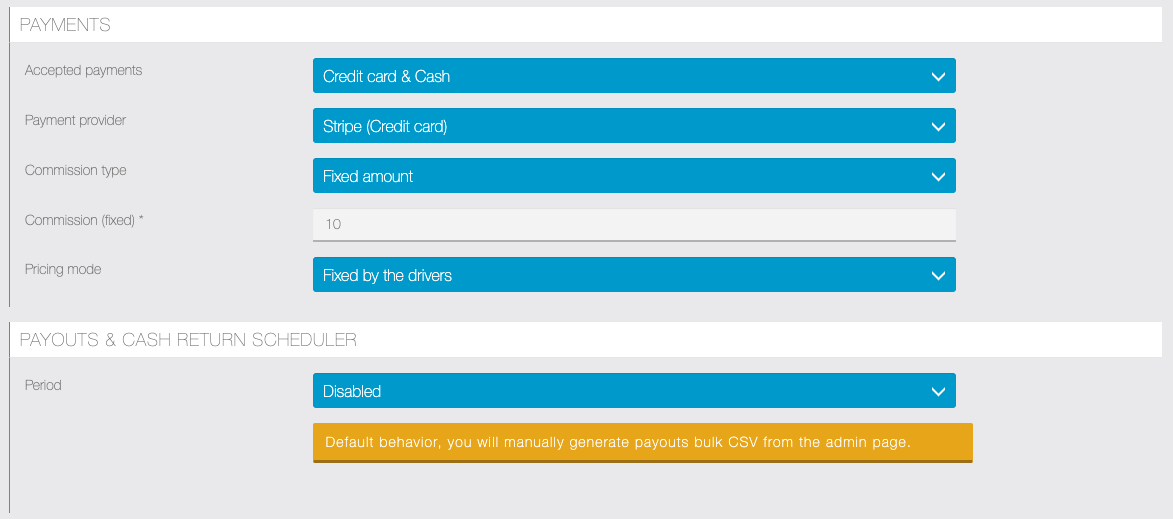

Description of the options:
| Option | Description |
|---|---|
| Admin e-mails | A coma separated list of the CabRide admins, this is used to notify payment requests, cash return, support, etc… |
| Currency | An extensive list of all the currencies supported by Stripe. |
| Distance unit | Kilometers or Miles. |
| Center map address | Centers the map on a specific address or on the user GPS location |
| Load POI from a places feature | Allow to link an existing Places feature to display POI (Points of Interest) on the Cabride map. |
| Search timeout | Defines the search request timeout, after what a request will expire if no driver answered. |
| Search radius | Defines the search radius around the passenger location. |
| Course mode | The course mode defaults to Immediate in the version 1.0.0 |
| Accepted payments | Accepts either Cash, Credit card or Both. |
| Payment provider | For credit card payments, the module comes with Stripe, more Payment gateways can be available on request & study. |
| Commission type | If your income comes from commissions, you can enable it, Fixed amount, Percentage or Disabled. |
| Commission | If the commission is enabled, you will defined the amount here. |
| Pricing mode | You can choose to fix the price by vehicle type or let each driver defines his fares. |
| Period | Allow to automatically generate Payouts and Cash returns for every week or month, default remains to disabled and requires manual generation/export. |
| Driver can register | When disabled, all new users will be marked as passenger.You can upgrade a Passenger to a Driver in the page CabRide > Passengers page |
| Enable custom form | Allows to display a custom form when a passenger request a ride. |
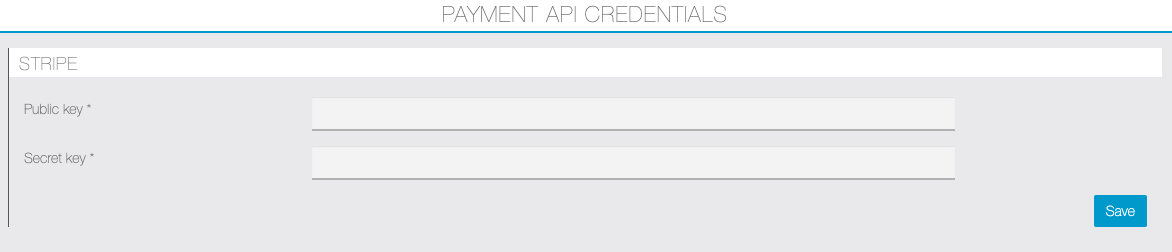
| Payment API credentials | Here you have to enter your Stripe API keys for payment by credit card. |
When you are done with the settings, you will have to create at least one vehicle type.
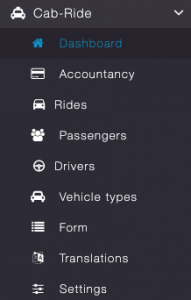
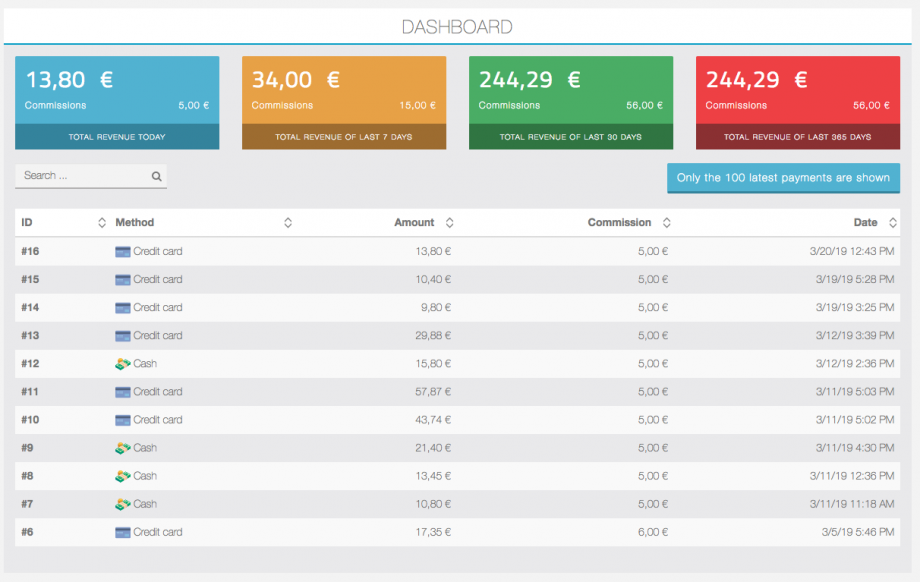
The CabRide > Dashboard
On the dashboard, you have access to a synthetic view of the latest 100 payments, and cumulative boards for daily, weekly, monthly & yearly earnings:
CabRide > Translations
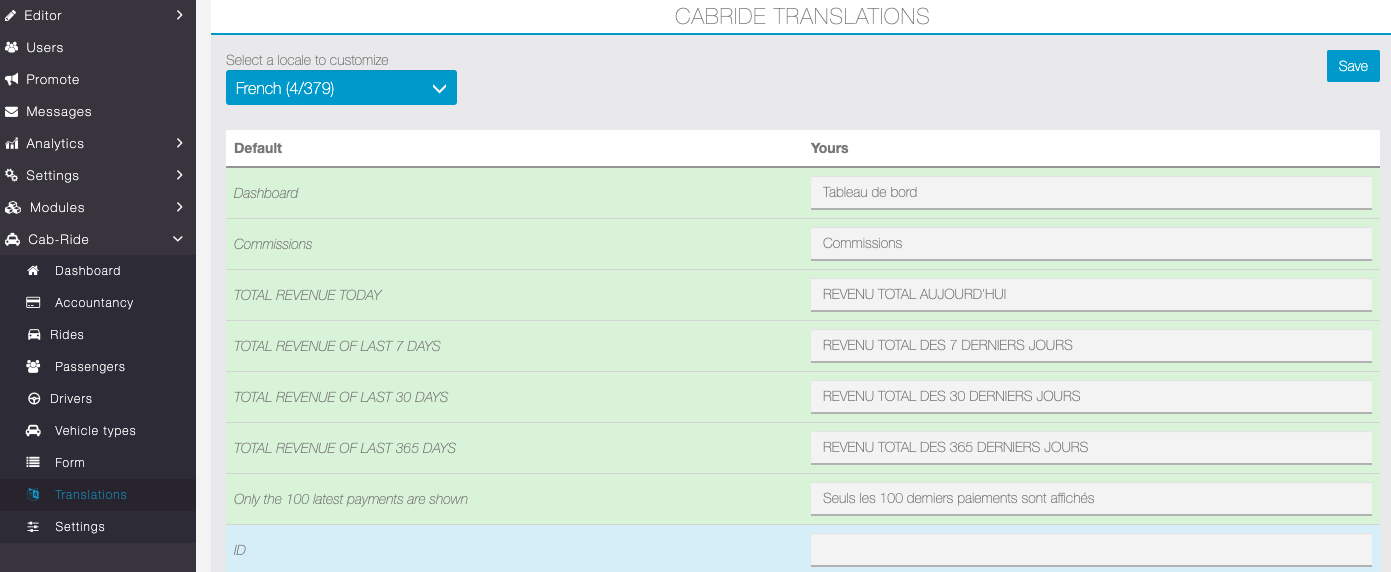
From this section you can edit the module translations, allowing you to make a unique app.

From this section you can create a custom form that will be displayed to the passengers when they request for a ride.
The answers will appear to the Driver in the detail of the ride request.Fields are grouped in two sections: Formatting elements and Input elements. Let’s introduce the different fields.
Formatting elements #
Title (divider): use it to create contrasting title/label elements.

White space (spacer): adds a 20px space between any other field.

Input elements #
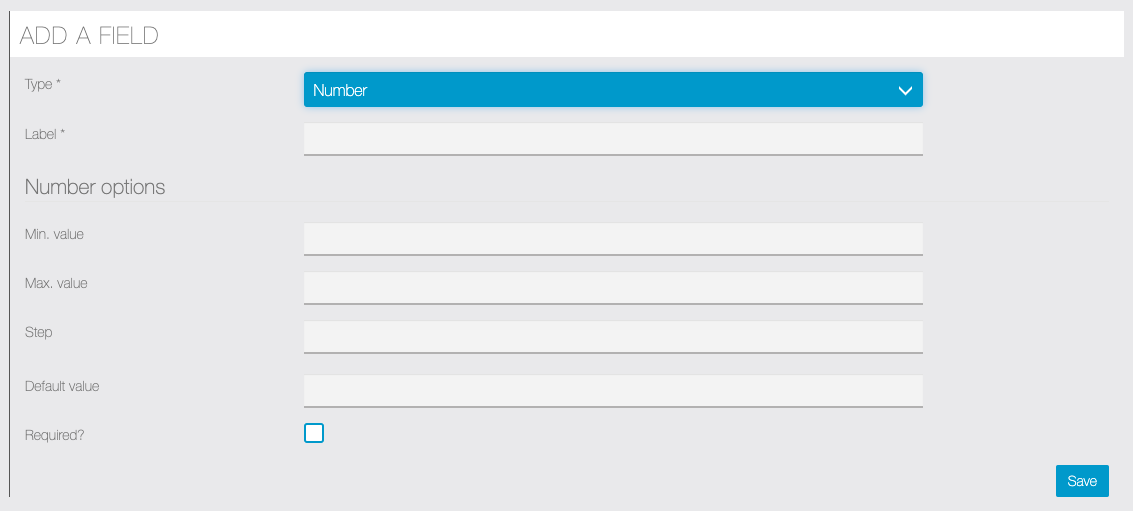
Number: adds a number input with options, minimum, maximum & step increment.
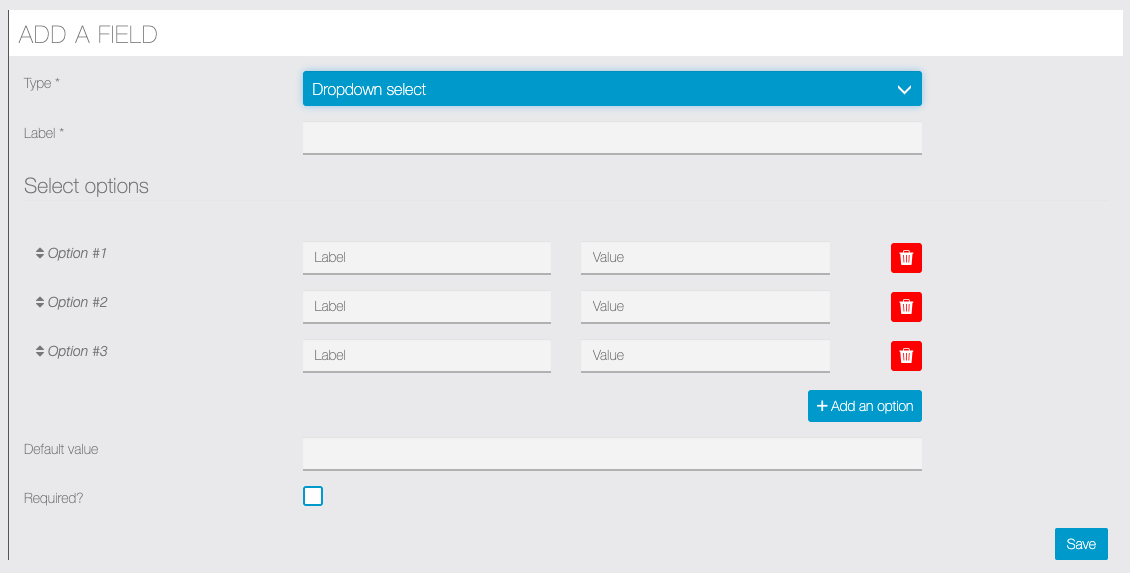
Dropdown select: adds a select element with multiple options.
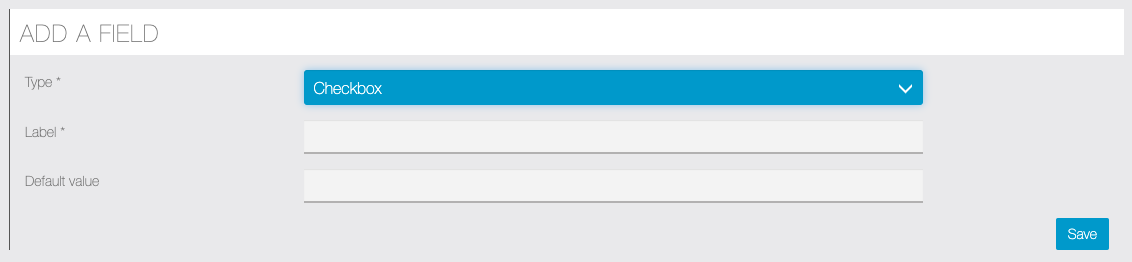
Checkbox: adds a simple checkbox element.
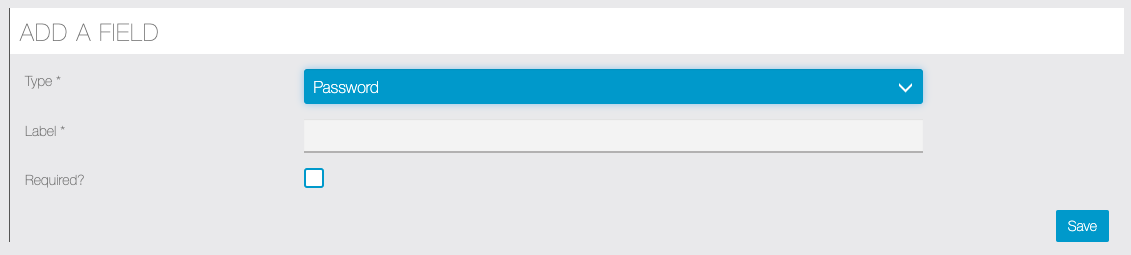
Password: adds a password text element, input text is not readable.
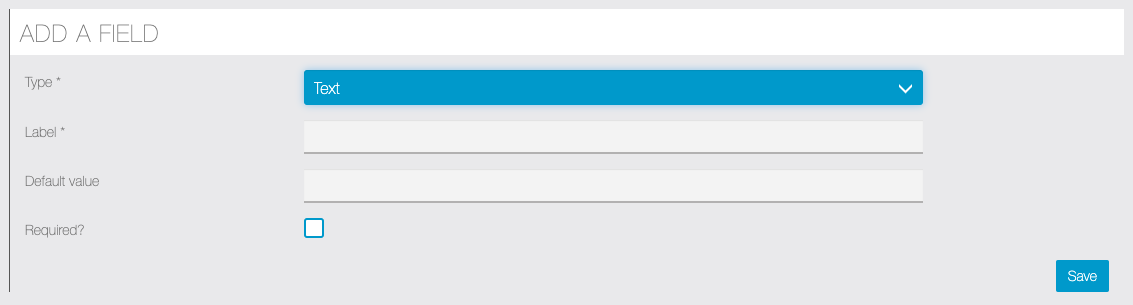
Text: a single line text input.
Textarea: a multiline text input.

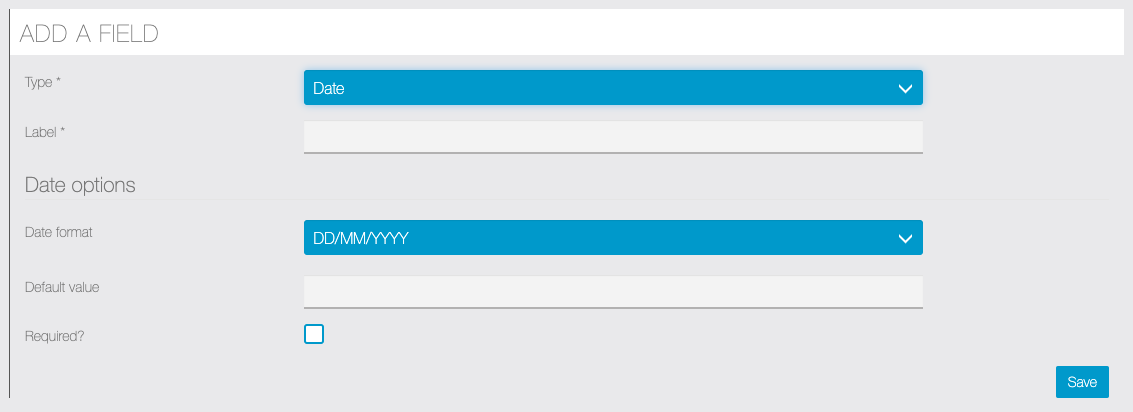
Date: simple date field, with format options.
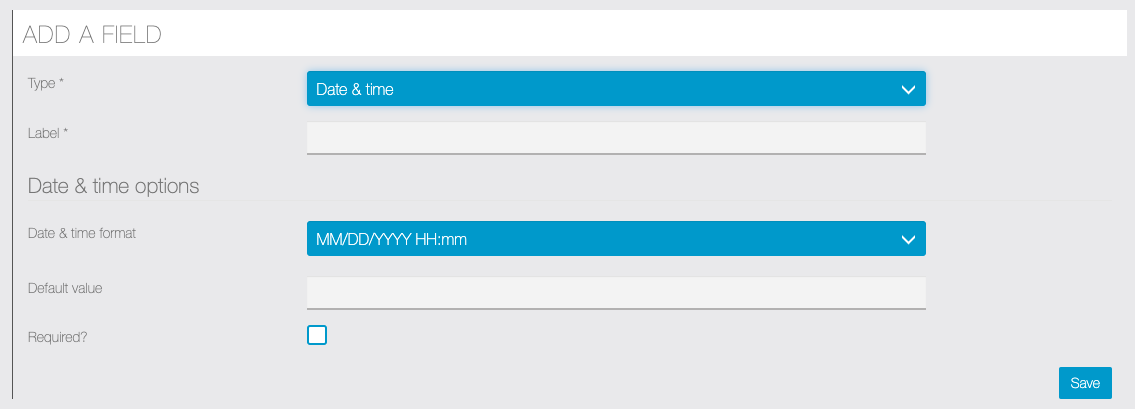
Date & time: simple date & time field, with format options.
In Manage fields section you can edit the fields, change their order and delete them:
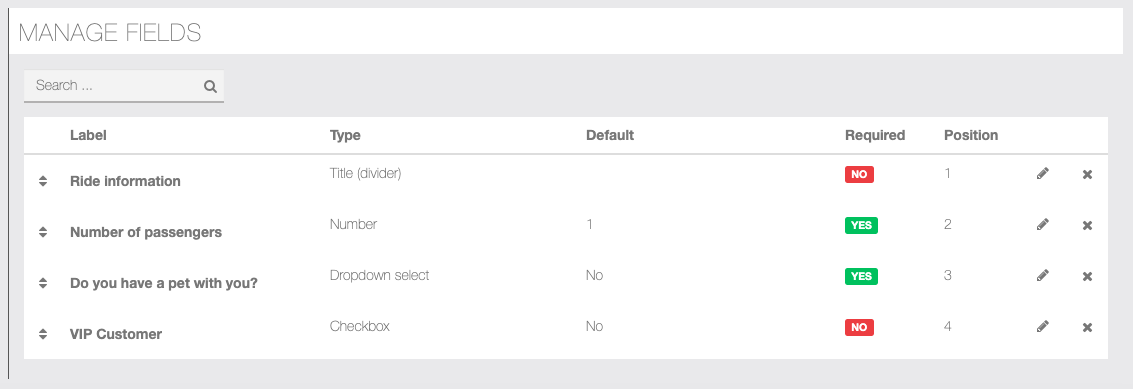
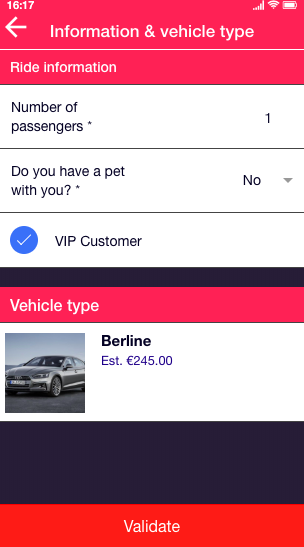
Here is an example of form in the app:
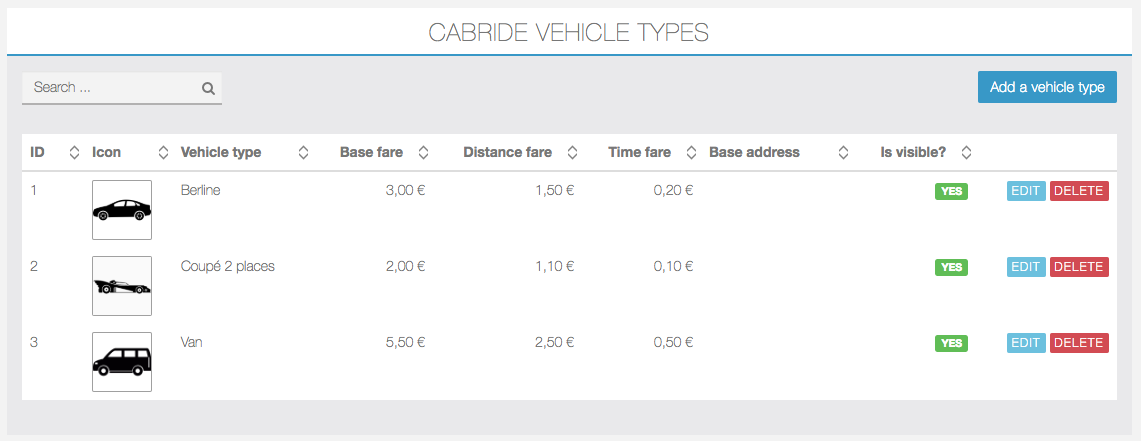
Open the page CabRide > Vehicle types
Then edit a vehicle type:
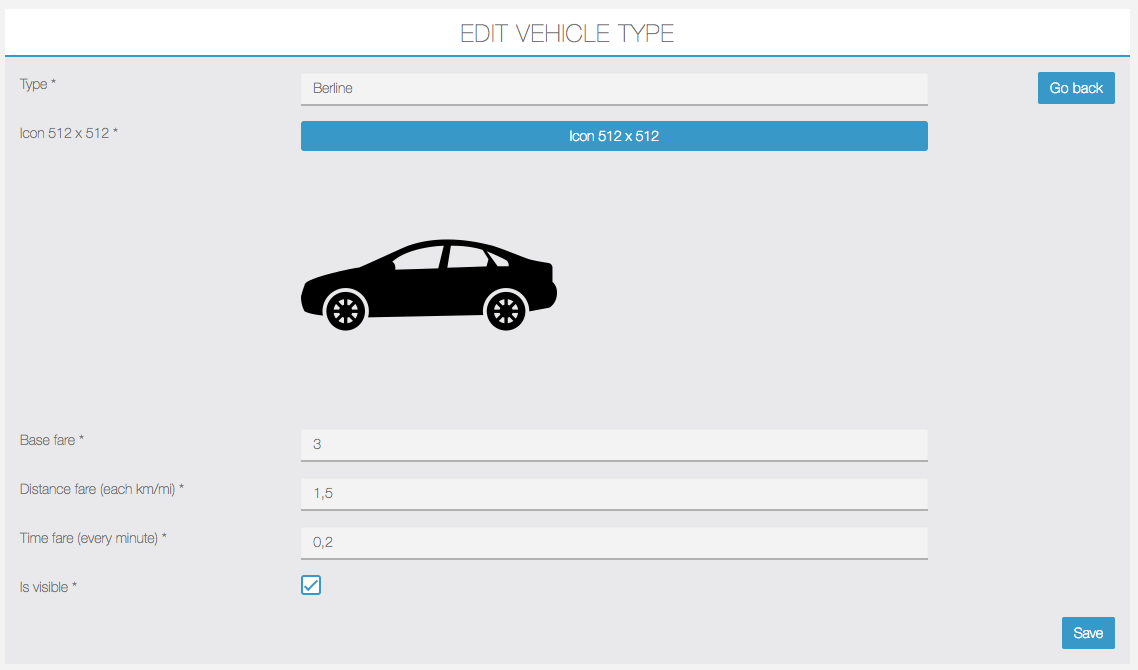
Vehicle types require at least a Name & an Illustration.
› Fares are required only when Pricing mode is set to Fixed by vehicle type.
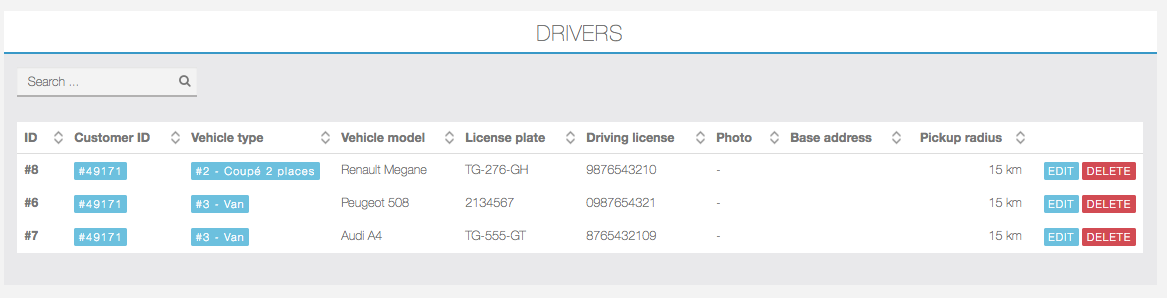
Then from CabRide > Drivers, you can manage & delete your drivers:
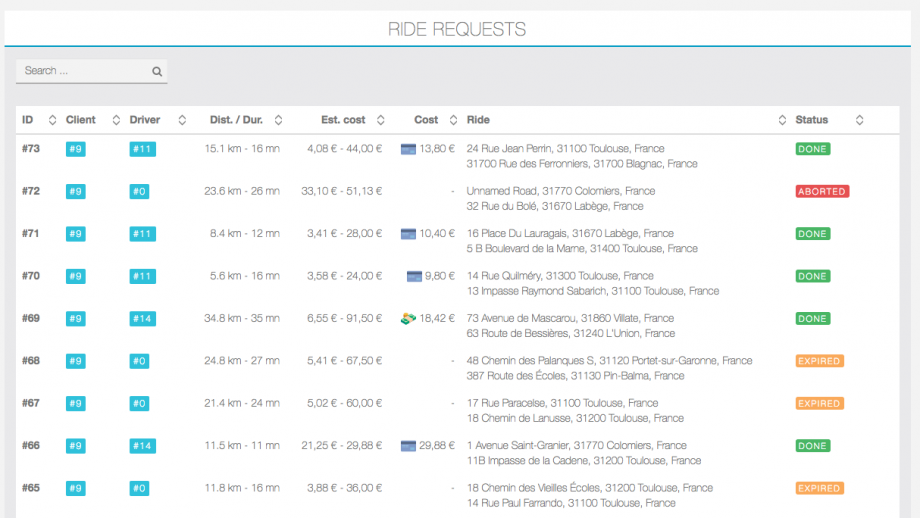
The page CabRide > Rides offers an overview of all the rides & requests, with their information and statuses.
From CabRide > Accountancy, you can manage your commissions payout & cash return requests:
Cash return requests:
All rides paid with cash will be aggregated by drivers, grouping all payments with the sum of commissions to be returned:
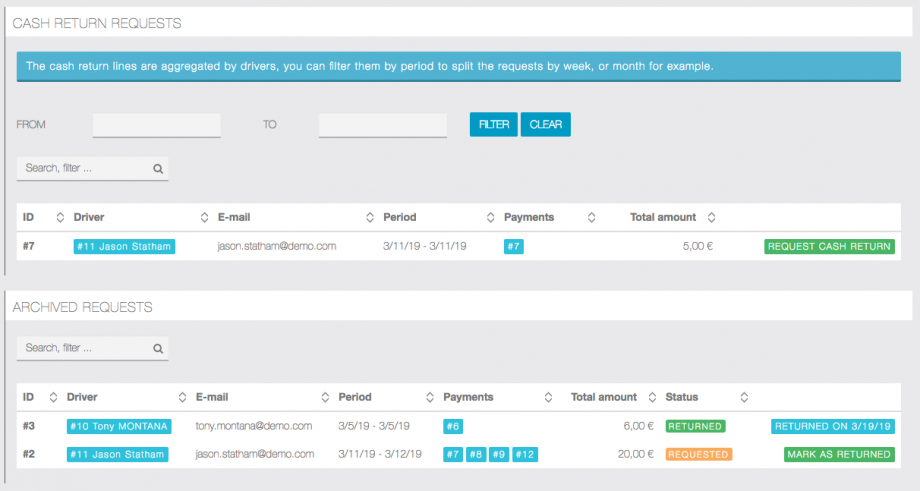
You can send cash requests to your drivers:
› Without date filters: all pending cash return will be aggregated regardless of the time period.
› With period filter: only rides paid by cash within the time period will be aggregated and asked for a return.When requesting a cash return, the line will be added to the Archived requests with the status REQUESTED, when the cash is returned, you can call the action MARK AS RETURNED to validate it.
Payouts
On the other hand, for payments done via credit card you’ll be able to create individual or bulk payout requests.
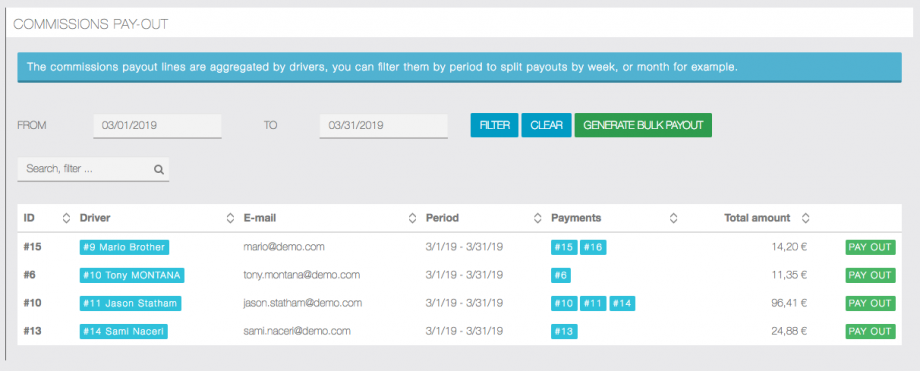
You can inform your drivers they will have their payouts processed:
› Without date filters: all pending payouts will be aggregated regardless of the time period and drivers will be notified.
› With period filter: only rides paid by credit card within the time period will be aggregated and notified as payout in progress to the drivers.
› The Payout action will create a pending payout for the given driver payouts.

The ![]() action will create a bulk csv export for all the pending payouts (filtered by time period, or not).
action will create a bulk csv export for all the pending payouts (filtered by time period, or not).
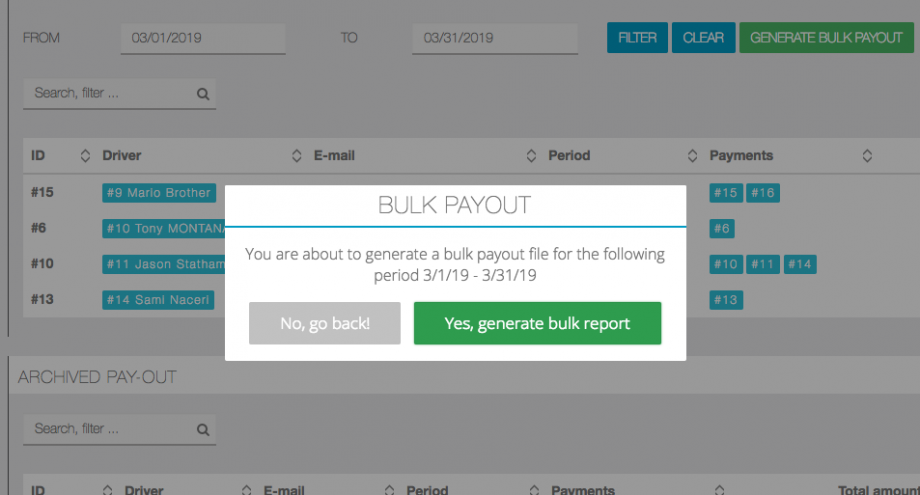
When the bulk report generation is done, you’ll see the report, and will be able to download it as CSV:

How to use the CabRider Features
When opening the App for the first time, passengers and/or drivers will be asked to select a role.
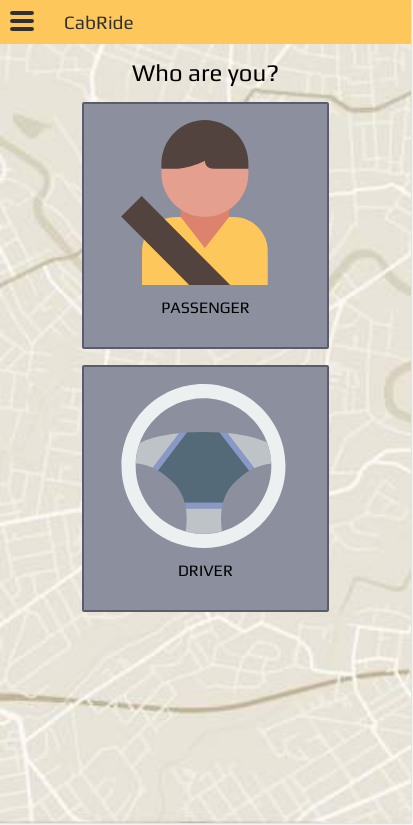
If the setting Driver can register is not enabled, all new customers will be marked as passenger. It’s then up to the app admin to grant customers as drivers from the page CabRide > Passengers with the action ![]()
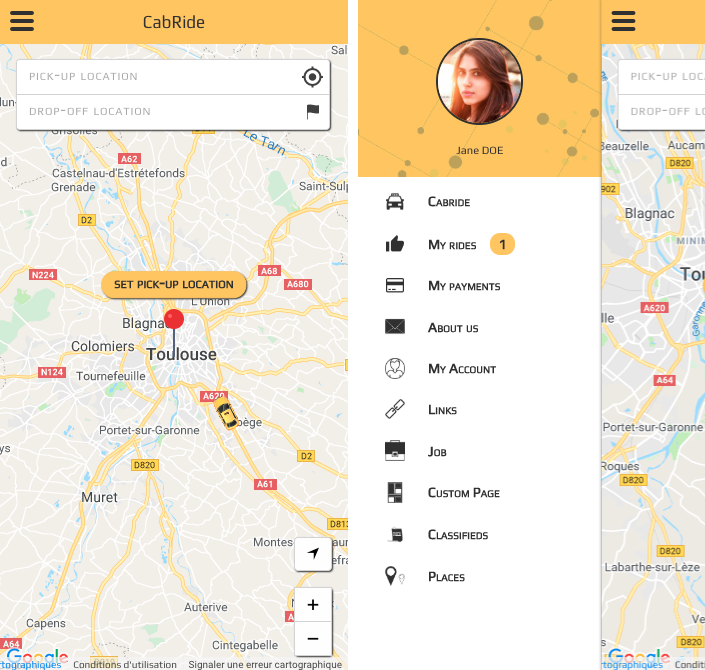
Passenger UI
The passenger homepage with a nearby online driver (yellow cab on the map).
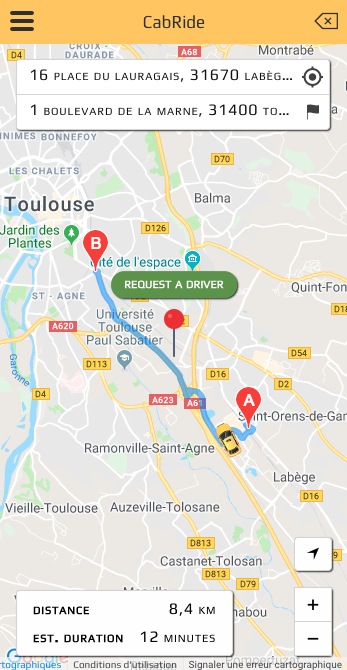
The homepage when the passenger defined a route, with estimated distance & duration.› At this step, the passenger can now start a search request for available drivers.
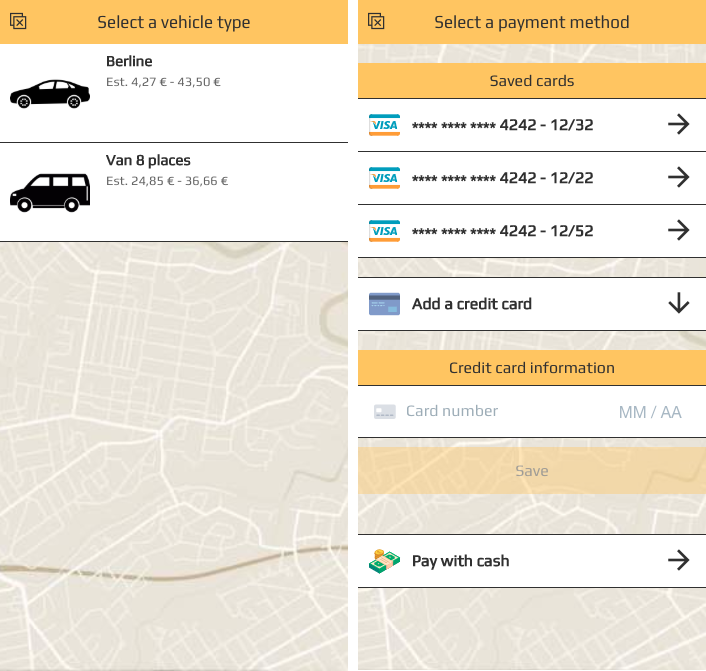
When the search is successful, the passenger will have to choose between the available vehicle types, If multiple drivers are available, a price range is shown to inform the passenger. When only one driver is available for a vehicle type, a single cost is shown.
After the passenger selected a vehicle type, he will have to select a payment method
Passengers can securely vault one or more credit card to be used later easily.
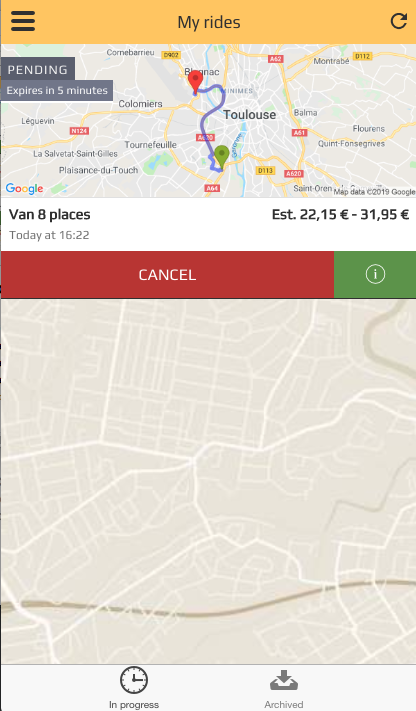
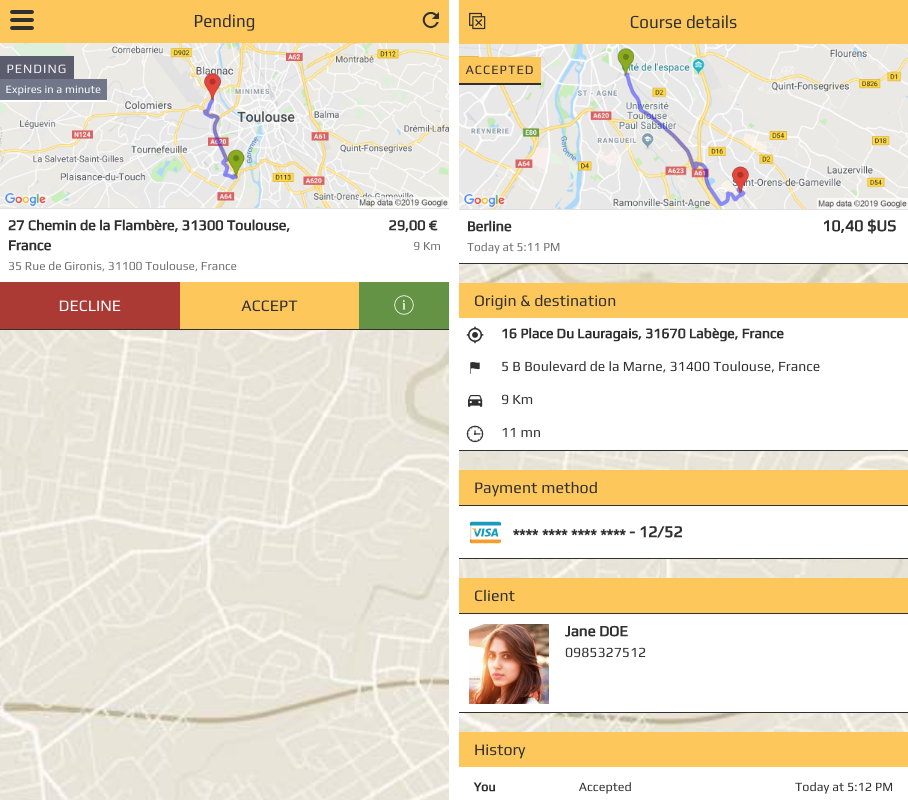
After selecting a payment method, the passenger will be directed to the page My Rides› The ride is Pending while waiting for drivers to accept, the expiration delay is shown.
While the request is in Pending state, passenger can still cancel it.
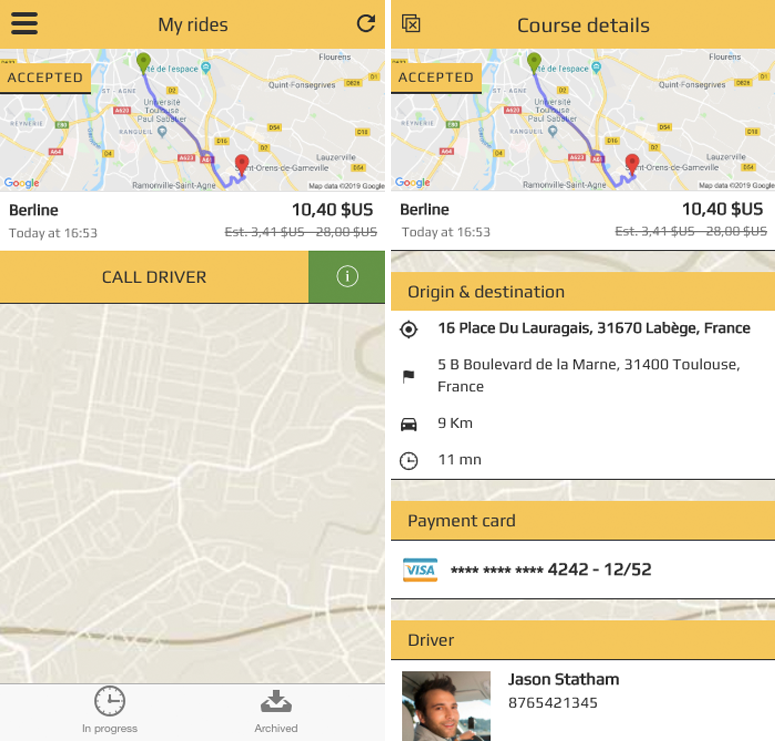
If a driver accepts the ride, passenger will receive a push notification and the ride state will change to accepted›
At this step, the passenger can make a phone call to the driver if needed, or see more details ![]() about the ride.
about the ride.
Driver UI
Driver nav & waiting homepage, next to each section, a counter shows how many requests or actions are yet active

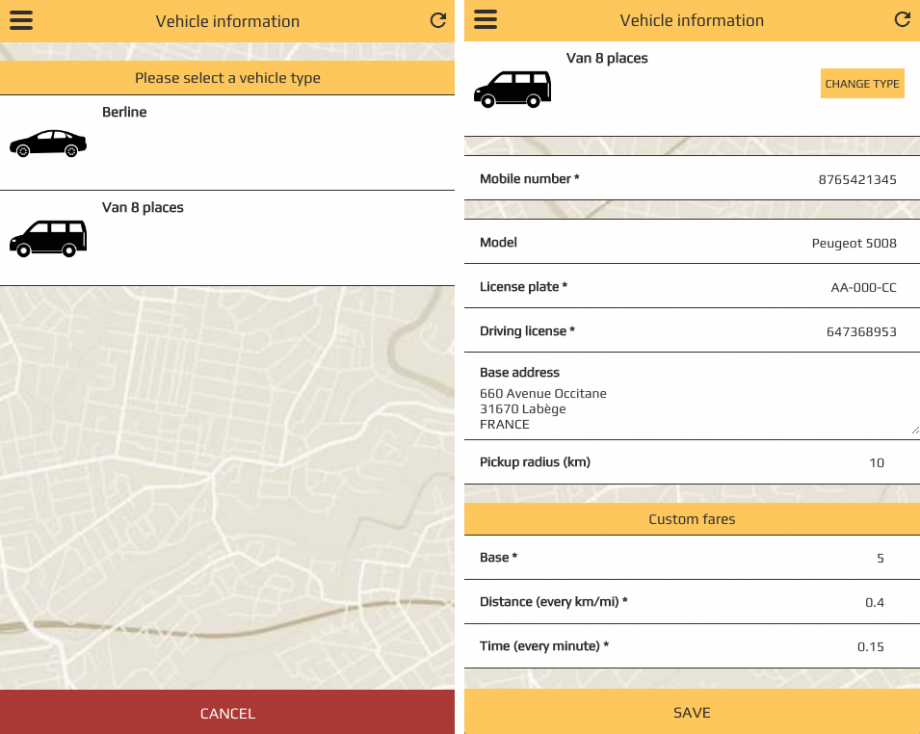
Vehicle information.
The driver will have to select a vehicle type, and fill information before going online.
The section Custom fares is only visible & editable when the setting Pricing mode is set to drivers.
With this pricing mode, drivers will fix their fares individually.
While waiting for rides, drivers will receive push if they match any request, the push will open the Pending page:
Here the driver can review the ride request while pending, and Decline or Accept.
When the driver Decline a ride, the ride will be moved to the Declined page, the driver can still accept it, if it’s not expired or accepted by another driver. When the driver accepts the ride, the passenger will receive a push, and the driver will get more information.
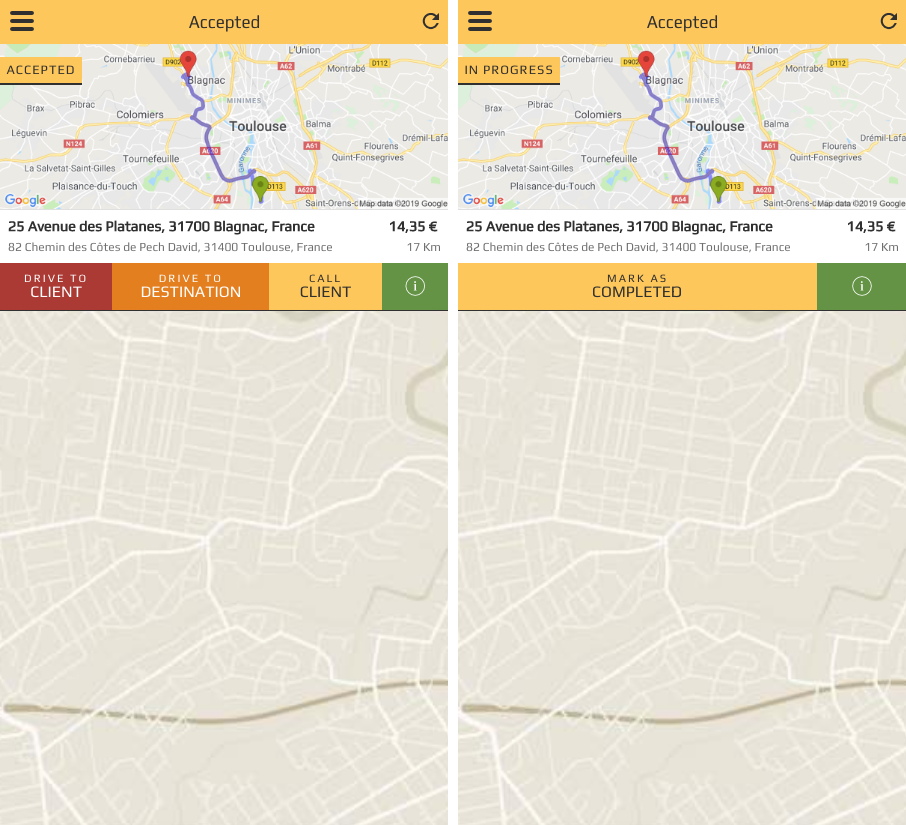
After the driver has Accepted a ride, he will have new actions
Drive to client: The driver will inform the client he is on his way, the passenger will be informed of the estimated time of arrival of the driver.
Drive to destination: The passenger is now on-board, and the driver starts the ride.
Call client: The driver can call the client for more information.
Both Drive actions will open a navigation intent to choose between Waze, Google directions, or Apple maps for iOS devices.
When the ride is done and the passenger arrived at destination, the driver will be able to mark the ride as completed.
If the passenger is paying by card, the card will be charged the course total.
If the passenger is paying with cash, he pays the driver directly.
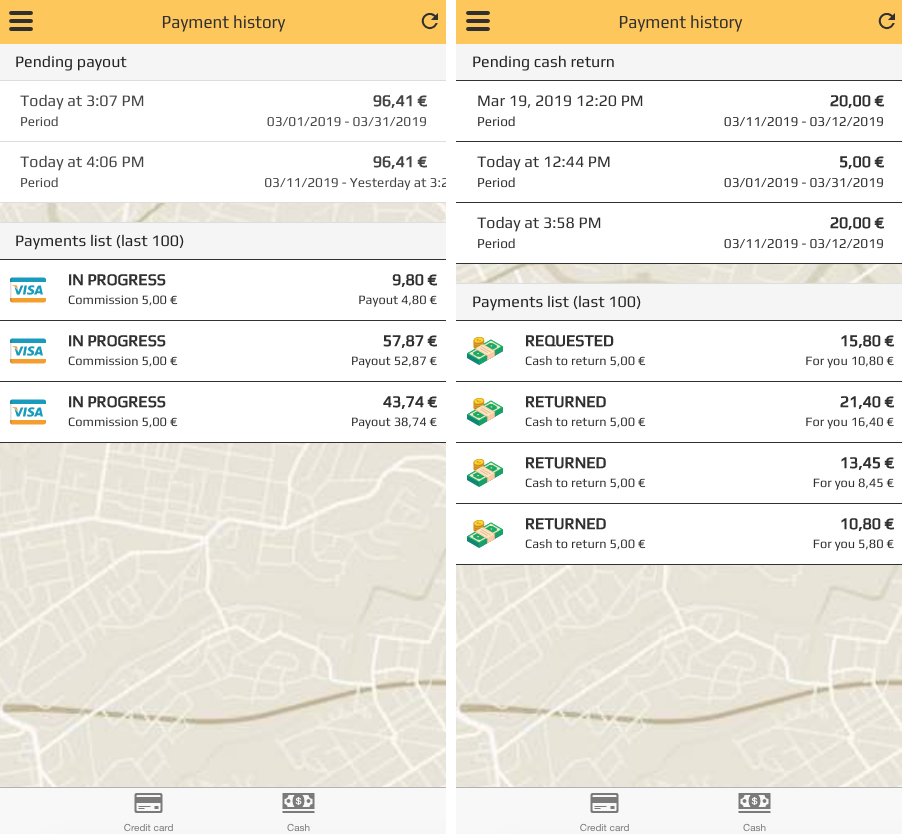
After rides are done, the driver can review his payment history:› The Payment history page is split in two sections:
-
- Credit card
- Pending payouts:
When the app admin mark payouts as pending, the driver will see his incoming payouts, with the total amount due, and the period covered. - The latest 100 payments are displayed with their respective statuses:
- UNPAID = The payout is due to the driver.
- IN PROGRESS = The app admin marked this payment for an incoming payout.
- PAID = The payout is paid.
- Pending payouts:
- Cash
- Pending cash return:
When the app admin mark cash payments to be returned, the driver will be notified he has pending cash return requests, with the covered period and the total amount to return - The latest 100 payments are displayed with their respective statuses:
- UNRETURNED = The cash is pending.
- REQUESTED = The app admin requested a cash return for this payment.
- RETURNED = The commission for this payment is marked as returned.
- Pending cash return:
- Credit card