To distribute an application on the App Store, you need to subscribe an Apple Developer account. The Apple Developer Program annual fee is 99 USD.
If you don’t already have an Apple Developer account you can subscribe your account here: https://developer.apple.com/programs/enroll//
This service needs Double Authentification. You have to create your apple developer account from a desktop and not from an Iphone or an Ipad.
Once you’ve completed your enrollment in the Apple Developer Program, you can sign in to App Store Connect with the Apple ID you used to enroll. App Store Connect is where you manage your App Store apps, see your sales reports, manage your App Store Connect users and testers, and more.
For more information about the complete process use the link below: https://developer.apple.com/app-store-connect/

To distribute an application on the Google Play Store, you need to subscribe a Google Play Developer account. There is a $25 USD one-time registration fee.
If you don’t already have one you can subscribe your account here: https://play.google.com/apps/publish/signup

There are two options to distribute an application on the App Store:
I – The manual method
You have a minimal technical knowledge and you want to publish yourself your application manually. In this case, take the following steps:
1. First you need to generate in Siberian the sources code of your application.
Connect to your backoffice, select the concerned application in Manage > Applications by clicking the button on the right of the list. In the section called “Mobile Source Codes & Builds” click on “Generate sources“. Your request enters the queue and is going to be generated, then a link appears to download the generated sources code.

2. Then you have to use an Apple software called Xcode to compile yourself the concerned sources code in the aim of generating your application. Of course, you need to have a Mac to be able to use Xcode.
![]() You can download this software here: https://developer.apple.com/xcode/
You can download this software here: https://developer.apple.com/xcode/
Actually you can do that without a Mac computer but you have to emulate your computer to install Mac OS and then install Xcode on Mac OS. Here is an article about that: https://www.udemy.com/blog/xcode-on-windows/
3. Connect to your App Store Connect account to complete your app page with your screenshots, description, etc… Then click on “Submit for review”.
II – The automatic method
You can submit your app to the App Store automatically with our auto-publishing service called “iOS Auto-publish“. This method doesn’t require any technical knowledge.
Here are the steps to publish your app with this service:
Prepare your App Store Connect account #
Apple accounts require to have the Two-factor authentification activated, but only for the owner of the account. Therefore we will add a new member to the Apple account:
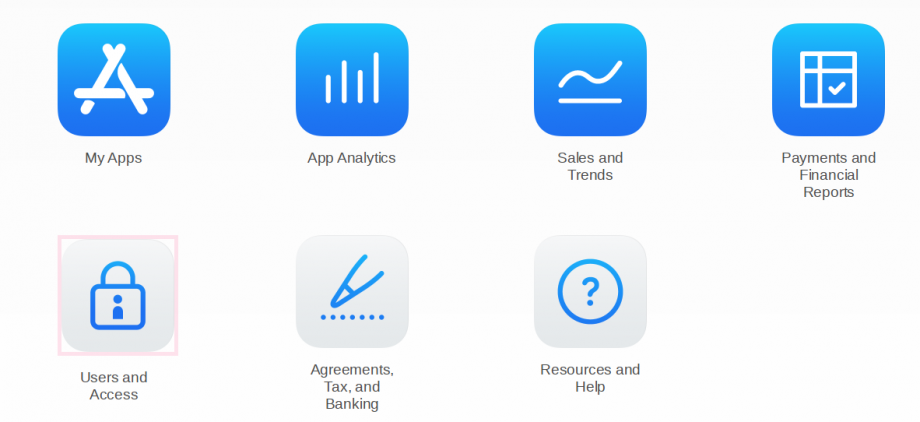
- Log in App Store Connect account, then open the “Users and Access” section:

- Click on the
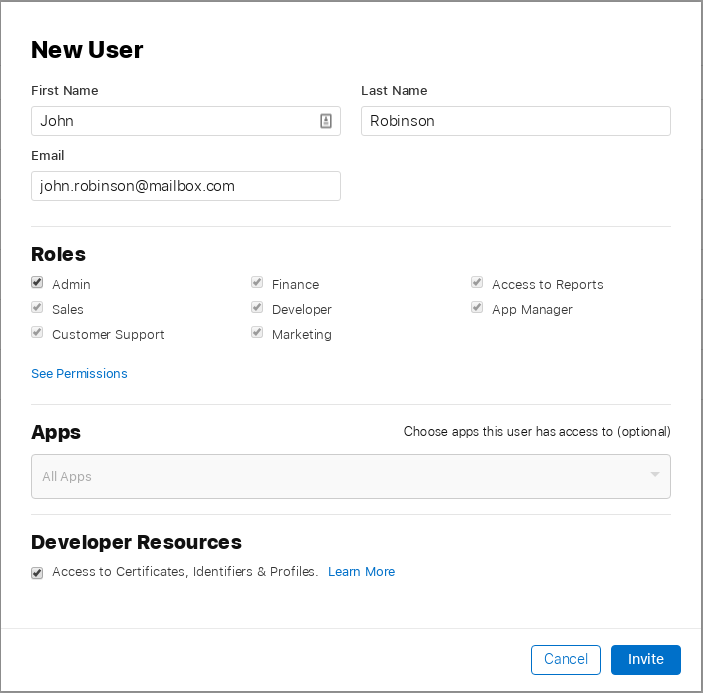
 to invite a new user by email. Pick one of your email addresses, it must not be linked to an Apple account already:
 Note: Be careful to set Admin as Role, All Apps and Access to Certificates, Identifiers & Profiles, otherwise you will have issues while publishing the app.
 - From your mailbox, accept the invitation and create your new apple account.
- Log in App Store Connect with this new account and accept any licenses. (if you have any licences to accept, it generates an issue during the publication)
- From the “Users and Access” section, you should see this:

main@siberiancms.com is the Account Holder (your main account), which is protected by the 2 factor authentification,
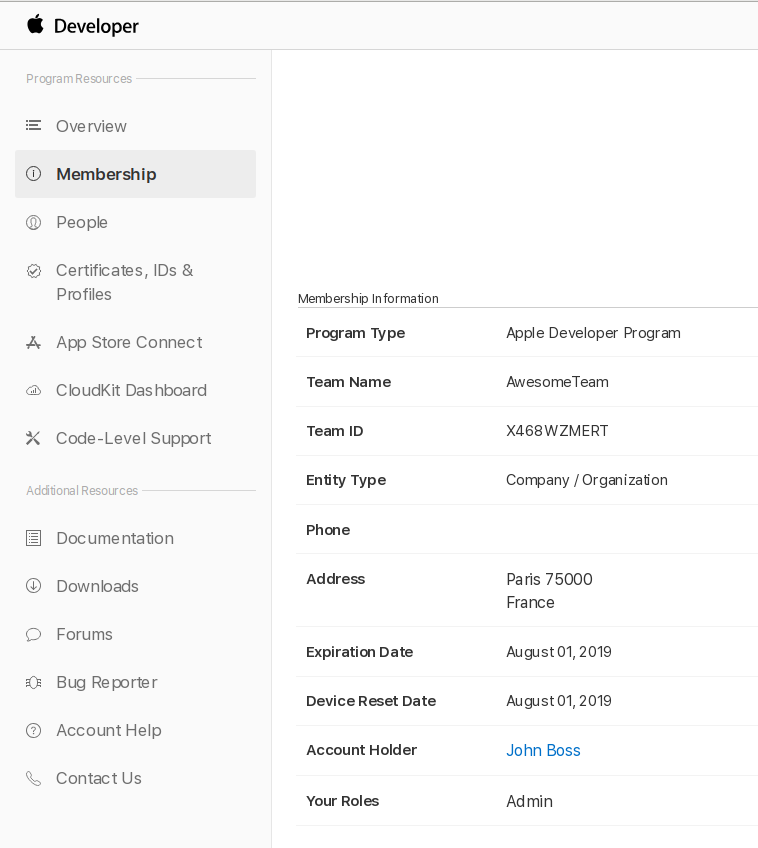
john.robinson@mailbox.com is the new account with Admin role. - Log in Apple Developer with the new account, and note your “Team Name” and your “Team ID”:

Set up the iOS Auto-publish service #
- Connect to your backoffice to enter your license in Settings > General

Use the iOS Auto-publish service #
- Select the concerned application in your backoffice Manage > Applications by clicking the button on the right of the list.
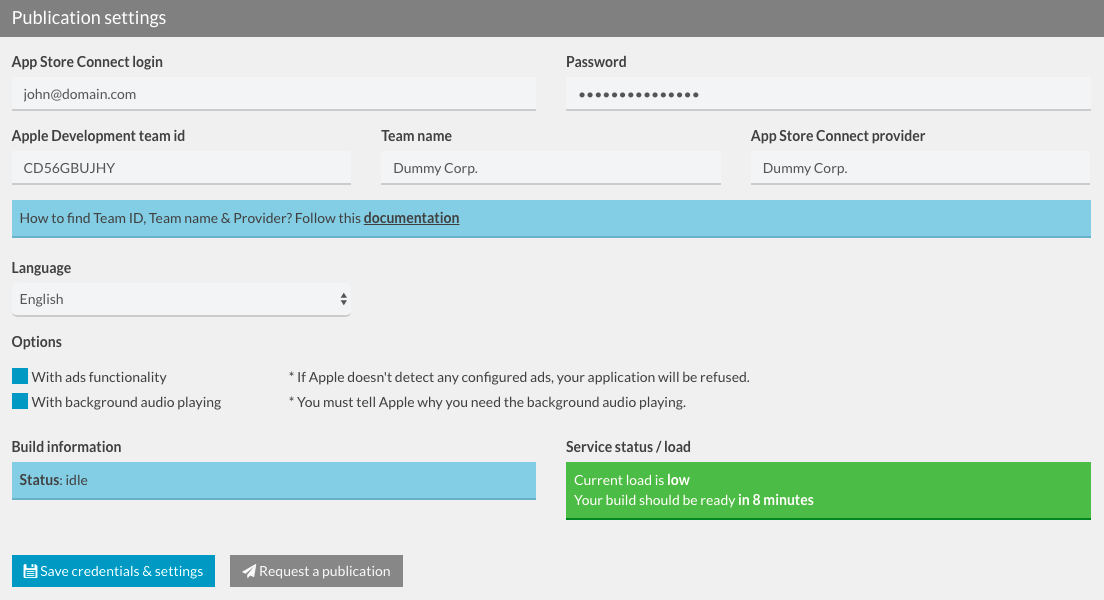
- In the section called “Generate and publish iOS Application” > Publication settings, enter your App Store Connect login and password then enter the Apple Development Team ID, Team name and App Store Connect provider.

- Select the concerned language and check the appropriate options if needed.
- Click on Save credentials & settings then click on Request a publication.
- Your app enters the queue and is going to be compiled and uploaded into App Store Connect by our build servers.
- Once done, you are warned, by email and in your backoffice, that your app has been uploaded.
- Then, from App Store Connect you just have to complete your app page with your screenshots, description, etc… Finally, click on “Submit for review”.(from step 4)

There are two options to distribute an application on the Google Play Store:
I – The manual method
You have a minimal technical knowledge and you want to publish your application by yourself manually. In this case, take the following steps:
1. Connect to your backoffice, then select the concerned application in Manage > Applications by clicking the button on the right of the list.
2. In the section called “Mobile Source Codes & Builds“:
Owners of the Single App Edition: click on the button “Generate sources” and few minutes after your sources code is available for download. Then, you need to build your APK by using a Google software called “Android Studio”.


Owners of the Multi-Apps and Platform Editions: click on the button “Generate Build” on the line Android APK and few minutes after your APK is available for download.

For owners of the Multi-Apps and Platform Editions hosted by us: click on “Request APK generation” in Service APK generator section.

3. Then you only have to follow the steps of this article in aim of publishing on the Play Store:
II – The automatic method
Otherwise, you can also buy our publication service for Android called “Android app publication” if you prefer that we publish the app for you on Google Play Store. This method doesn’t require any technical knowledge because the “Android app publication” includes the creation of certificates, screenshots and the generation of APK. The submission is automatically done under your own Google Play Developer account. To use this module take the following steps:Note that builds purchased are only consume if success.
2. When you purchase this service you will receive an email that explains what kind of information you need to provide us (info like if you want your app to be paid or not, the app description, etc)
3. We send you the APK file after submission on the Google Play Store, and we complete for you the app page on your Google Play account.
You can publish and download the sources as many times as you need. You have absolutely no limit, it’s an open-source solution.
Before publishing your application you can have a preview of your application with our tool called “Apps Company Previewer”.
According to the number of publication you have to choose in these three prices:
– One iOS submission (no subscription) – 9.90€ (if you want more of one submission you can add several submission to your cart)
– Up to 5 iOS submissions per month – 29.90€ (this kind of subscription involves a payment every month)
– Unlimited iOS submissions per month – 49.90€ (this kind of subscription involves a payment every month)
To purchase this service you can use your credit card or a Paypal account.
For “Android app publication” there is an only one price, 19€, so you have to purchase this service each time you need to do a new submission.
To purchase this service you can use your credit card or a Paypal account.
To see the remaining builds you have two possibility:
1. Connect to your Backoffice then go in Settings > General >> Your Platform > Your iOS autobuild License Key
2. Or go to Manage > Applications, select an application by clicking the button on the right of the list. In the application page you can find the remaining builds in the section called “Generate and publish iOS Application“.
If you encounter this problem with the sources that takes too much time to be generated (more than 5 minutes), you can do the following:
– In your Backoffice go on your dashboard.
– Click on the button “remove locks”.
– Go back in the application page from Manage > Applications.
– Cancel the source generation.
– Click on “generate sources” again.
If you don’t find the encountered error in this article, you can contact us to resolve your problem at this email adress: mailto:contact@kwickapp.com
Verify you have installed the last IOS SDK. This is mandatory in to use Xcode correctly.
You can find more informations about it here : https://developer.apple.com/ios/
After installing the IOS SDK you might compile your application in Xcode.
You have to open the app in Xcode with the workspace file , and not the project file
Read the following documentation to resolve your problem :
You have to remove the file com.google.zxing.client.android.captureactivity.jar which is in:
var/apps/ionic/previewer/android/libs/
Then download the source again after that.
In Android Studio, go in Tools > Android > SDK Manager and update all from the tabs “SDK Platforms” and “SDK Tools”
It’s a specific problem in Android Studio, and it’s hard to know all the solutions about problems from another software, but here are some links to some other users and the solutions they have found:
http://stackoverflow.com/questions/29808199/error-running-android-gradle-project-sync-failed-please-fix-your-project-and-t
http://stackoverflow.com/questions/24778598/error-running-myactivity-gradle-project-sync-failed-please-fix-your-project-an
It seems the second answer has fixed the problem for many users:
1. File -> Invalidate caches / Restart
2. Shutdown Android Studio
3. Rename/remove .gradle folder in the user home directory
4. Restart Android Studio let it download all the Gradle stuff it needs
5. Gradle build success !
6. Rebuild project…. success !


